
고래씌
[SpringBoot] 2-2. React에 스프링부트 연동(채팅방 생성) 본문
1. 채팅방 생성
▶ ChattingRoomList.js
import { useEffect } from "react";
import { useState } from "react";
import axios from 'axios';
import { useSelector } from "react-redux";
import { useNavigate } from "react-router-dom";
export default function ChattingRoomList(){
let [채팅방목록, 채팅방목록변경] = useState([]);
let [모달, 모달창오픈] = useState(false);
useEffect(() => {
axios
.get("http://localhost:3000/api/chatRoomList")
.then(
// 응답데이터 함수
(response) => {
console.log(response);
채팅방목록변경(response.data); // 채팅방 목록페이지 조회
}
)
.catch( (err) => console.log(err))
}, [])
return (
<>
<section className="board-list">
<h1 className="board-name">채팅방 목록</h1>
<div className="list-wrapper">
<table className="list-table">
<thead>
<tr>
<th>방번호</th>
<th>채팅방 주제(제목)</th>
<th>개설자</th>
<th>참여인원수</th>
</tr>
</thead>
<tbody>
{
채팅방목록.length == 0 ?
(
<tr>
<td colSpan={4}>존재하는 채팅방이 없습니다.</td>
</tr>
) : (
채팅방목록.map((채팅방) => {
return(
<tr key={채팅방.chatRoomNo}>
<td>{채팅방.chatRoomNo}</td>
<td>{채팅방.title}</td>
<td>{채팅방.nickName}</td>
<td>{채팅방.cnt}</td>
</tr>
)
})
)
}
</tbody>
</table>
<div className="btn-area">
<button onClick={ () => 모달창오픈(true)}>채팅방 만들기</button>
</div>
</div>
</section>
{모달 && <채팅창 모달창오픈={모달창오픈} />}
</>
)
}
function 채팅창({모달창오픈}){
// 채팅방 생성기능 추가
let [title, setTitle] = useState('');
let user = useSelector((state) => state.user)
const navi = useNavigate();
function 채팅방생성(){
const chatRoom = {
title,
userNo : user.userNo
}
console.log(navi);
axios
.post("http://localhost:3000/api/openChatRoom", chatRoom)
.then((result) => {
// result 값으로 추가된 방번호(chatRoomNo)를 얻어와서
// 해당방번호를 가지고 페이지 이동시켜줄 예정
// navi("/chat/chattingRoom/"+result.data)
alert("채팅방생성성공");
})
.catch(error => console.log(error))
}
return(
<div className="modal">
<div className="modal-content">
<span className="close" onClick={() => 모달창오픈(false)}>×</span>
<div className="login-form">
<h3>채팅방 만들기</h3>
<input type="text" name="title" className="form-control" placeholder="채팅방 제목"
onChange={(e) => {setTitle(e.target.value)}}/>
<button onClick={채팅방생성}>만들기</button>
</div>
</div>
</div>
)
}
▶ UseSlice.js
// state 보관소

import { configureStore, createSlice } from "@reduxjs/toolkit";

let user = createSlice({
    name : 'user',  // state이름
    initialState : {userNo:1, email : 'whale@iei.or.kr', nickname : 'whale', profile : '/images/user2.jpg'}, // state초기값
    // let [user, ?] = useState({email : ..., nickname:...})
    reducers : { // reducers : state의 값을 변경해주는 함수"들"을 정의해주는 부분.
        // 모든 reducers함수들의 첫번째 매개변수는 현재 state값이 깊은복사된 형태로 전달됨
        프로필랜덤변경(state) {
            let random = Math.floor(Math.random() * 5); // 0~5 랜덤값, Math.floor:소수점버림
            state.profile = `/images/user${random}.jpg`;
            return state;
        },
        로그아웃() {
            return null;
        },
        로그인(state, 데이터) {   // 첫번째 매개변수는 state 고정이고 두번째 매개변수는 내가 전달할 값
            console.log(데이터.payload);
            return 데이터.payload;
        }

    }
});

export default configureStore({
    reducer : {
        user : user.reducer // 변수명.reducer
    }
})

// reducers내부에 작성한 코드들은 actions라는 객체안에 담겨있음
export let {프로필랜덤변경, 로그아웃, 로그인} = user.actions;
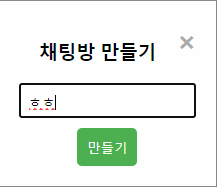
▶ 결과

'Server > SpringBoot' 카테고리의 다른 글
| [SpringBoot] 2-4. React를 스프링부트에 연동(메세지 추가) (0) | 2024.02.06 |
|---|---|
| [SpringBoot] 2-3. React 스프링부트에 연동(채팅방 상세보기, 메시지) (0) | 2024.02.06 |
| [SpringBoot] 2-1. React에 스프링부트 연동(게시판, 채팅방 목록) (0) | 2024.02.05 |
| [SpringBoot] 1-5. 메뉴 삭제 - DELETE (0) | 2024.02.02 |
| [SpringBoot] 1-4. 메뉴 검색, 메뉴 수정 - PUT 방식 (0) | 2024.02.02 |
'Server/SpringBoot' Related Articles
more


